The first thing you need to do is gather your tools. I ask Cassondra what she had and she told me nothing, except a sewing machine. I had bought 20 yards of red material at the factory outlet here in my home town, so I took it for her to make her first items. I found a Simplicity pattern that fits a 2 through 6x. A good pair of cutting scissors, I bought her the kind I use Fiskars,
keep them hid. Nothing ruins a good pair of fabric scissors quicker than cutting anything other than fabric. A tape measure is a must. Pins, pin cushion, seam ripper and hope you never have to use it, but we did. the biggest mistake was mine. I think that gave her more hope, even if it did slow us down. Some days you should just not get up. We counted the yardage for each item on the pattern then doubled it. Cassondra and my Grandson Joe have three little girls, we sewed for the older two. We put the material in the washer, Cassondra wanted to embroidery an S on Sadee and Sophee's jumpers. Never embroidery on fabric or any ready made item with out washing. I learned the hard way. If it shrinks the least bit it will cause the design to wrinkle, embroidery thread does not often shrink.
While the fabric was washing and drying we measured the two sweet little girls.
This is Sophee the oldest of the two. Sophee's hair is really beautifulf. Length of back from neck to waist.
Chest
Waist and hips.
Length of back. This shows you best how to measure. And the length of the full dress. I did not take a picture of every measurement, compare with the pattern. We bought ten yards of a non woven material marked with dots every inch to copy the pattern, This way you can use the paper pattern for years. Patterns are very expensive, and easy to tare and wear out. Cassondra will be able to use this pattern for years. Buying one that fits from 2 to 6x is a good buy, if you make them ion the non-woven material in each S. you need. I have the same shirt pattern I have used since 1995 making our holiday shirts my paper pattern is still like new. We also have a purse pattern I will show you in a later blog. My friend and I have drawers full of shirts for every holiday. Also you can make adjustments with out cutting your bought paper pattern. We compared the girls measurements to the pattern Sadee was a 3 with a 5 length. Sophee was a 3.
 |
| Cassondra reading the instruction. |
Read every word on the pattern and on the instruction sheet. You should look at every notch, word and dot on the pattern and transfer them to the copied pattern. In time you will be able to sew up a simple garment with out the instruction.
Hear I am showing Cass how to mark the grain line on her new pattern. Mark all information on the new pattern from the paper one. Such as
cut on fold, back, front, straight of grain line of fabric.
The
straight-of-grain-line of fabric is on of the most important markings on the pattern. If you do not cut on the
straight-line-of-fabric your garment could most likely hang badly. Now I will tell you a true story. I worked in J C Penny's Fabric Department in the 70's A woman came in and told me the pattern she bought from us ruined her pair of pants. She had bought the fabric from Roy's
Fabric Center. I am almost sure she tried to get them to replace the fabric, however Mrs Roy knew the lady was to blame. I did also when I saw the pair of pants. The side seam of the legs turned out toward the center of the pants. She informed me she had worked for Penny's in Kansans and she knew I could not refuse her, because the customer was always right. Well I knew she was not, however I went up stairs and told my boss what happen was she had not cut on the grain line. She was at fraught. Did not matter, I had to give her a new Pattern and pay for her material. However before I did I showed her on the pattern, she brought back the grain line marking and explained nicely how to measure it on her material. She really stole from J. C. Penny's and I think she knew I knew it.
You measure from the savage the bottom of the line and the top of the line, the tow must be the same.
We are laying a skirt on the fold. Measure from the savage side of the fabric top and bottom, they must be the same. As small as this skirt is, we could get the front and back on one length of 45 inch fabric.
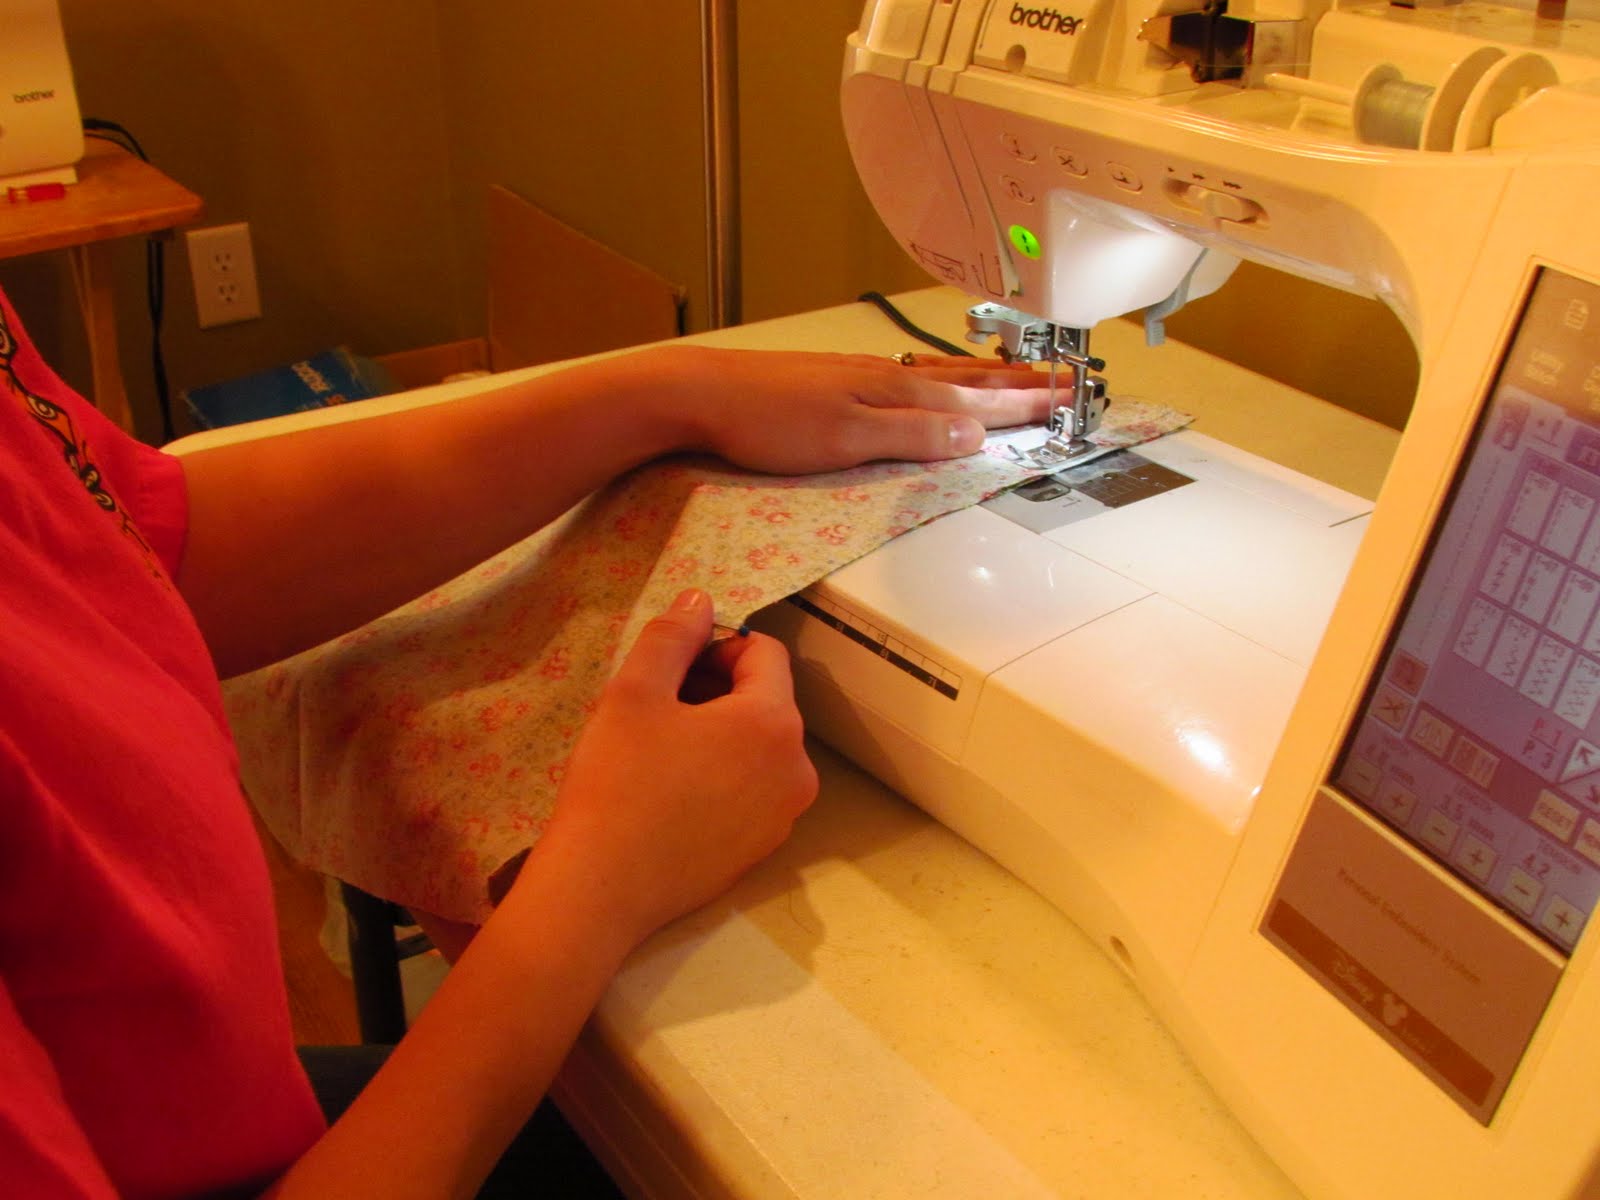
 |
| Cassondra sewing the skirt from the bottom up. |
Make a 5/8 inch seam allowance mark on your sewing machine, with tape. Make sure you measure from the needle with it down. Sew up from the bottom because you will be sewing in the direction of the most lengthwise grain. Most pieces will have a 5/8 inch seam allowance, if not you pattern will specif.
Again I will remind you to read every word on you pattern and the directions.
Press all seams open,after you finish them with a zigzag stitch to keep them from raveling out.
Turn under at the top a 1/4 inch hem and then the amount specified on the pattern, leaving an opening to run your elastic through. Joe put our elastic in our skirts for us a big help. Cut the elastic 1 or 2 inches smaller than the waist measurement, if the elastic is a soft elastic. A firm elastic cut 1 to 2 inches longer. Pin a safety pen on both ends on the elastic and run though the the turn down waist band. Hem the bottom 1/4 inch, I use a zigzag stitch, we turn up what the pattern marked.
Joe putting elastic in the pants he made.
This is a pants leg, I am marking the wrong side with a piece of chalk after cutting the pants out.
Both sides looked so much alike it was difficult to tell them apart.
Joe sewing up a pair of pants.
I am ripping out a mistake I made. I sewed the front of the pant together and the backs together that is wrong. You sew one front and one back together matching notches. Then slip them down into one another. Sew from front stride seam to back. Cut seam from notch to notch down to 1/4 and finish with a zigzag stitch. The rest of the seam leave at 5/8 finish with zigzag stitch and press open. Finish top with 1/4 inch hem, then turn under the amount specified in the pattern instructions. Hem to fit person.
Cut stride seams from notch to notch to 1/4 inch seam. Finish with zigzag stitch. I like to stitch a bar stitch( a zigzag stitch set on 0 length) at the top of the seam so it will not come out. I took a piece of chalk and colored the bar stitch.

Joe pressing his pant seam open before sewing across it, very important.
 |
| Sadee |
 |
| Sophee | | | |
I think she was a little shy being topless.
 |
| Joe and Cassondra |
|
|
|
|
|
|
A wonderful time I had and am very proud of these two. Joe has made a Poncho for the baby girl. Wonderful job, very proud of him. Cass made blankets and not the tied kind but the hemmed kind for Christmas presents and pajamas for her nieces for Christmas. I taught some women years ago how to make under clothes(I order the tricot from a shop in Miss.) they already knew how to sew, however they did no better than Cass and Joe.
Hope you have enjoyed this first blog of learning how to sew with Gerber Daisy. Hope you will get your scissors and start cutting. Happy sewing to you from me, Gerber Daisy. Next lesson How to make a shirt.


